
Grandma Davidson’s Baked Apple Pudding – A Cozy Old-Fashioned Apple Dessert
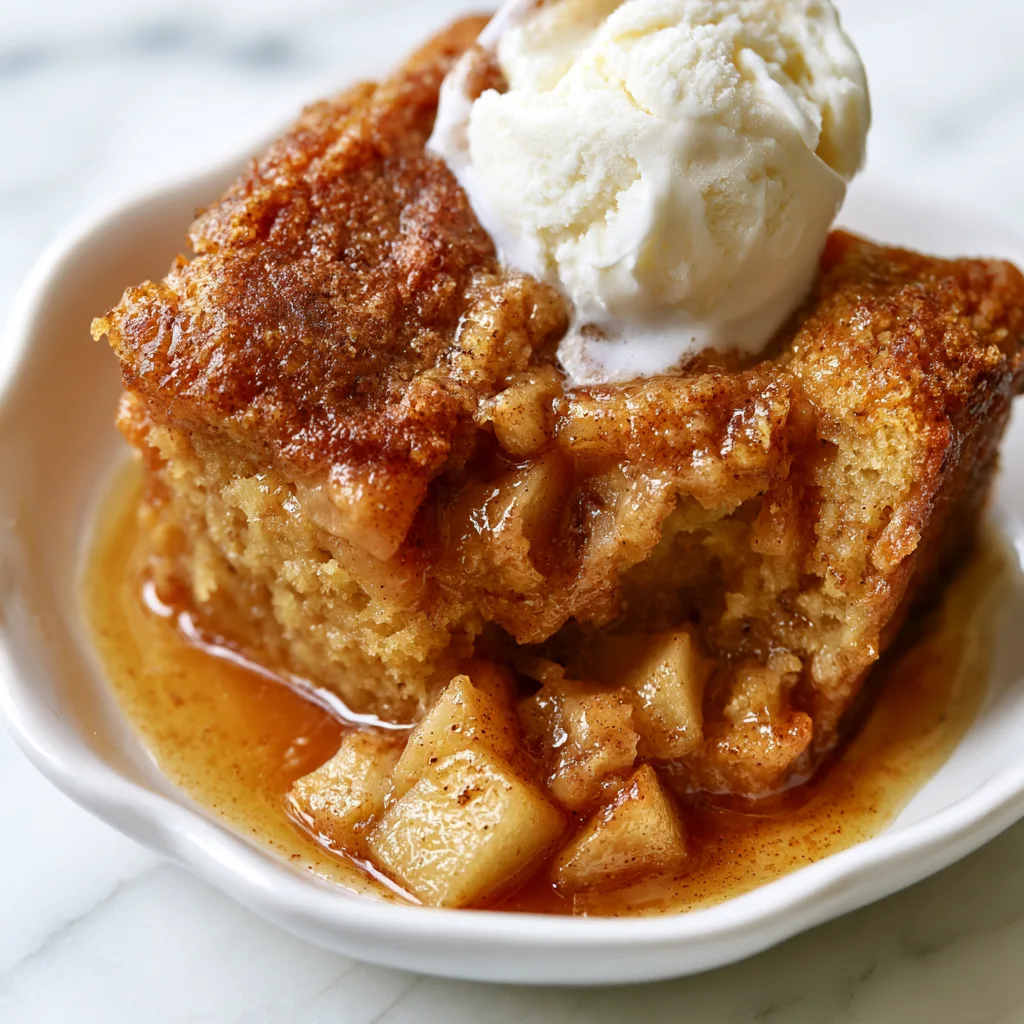
There is something wonderfully comforting about a warm apple dessert fresh from the oven, especially when cinnamon, brown sugar, and tender apples come together in every spoonful. Grandma Davidson’s Baked Apple Pudding captures everything that makes old-fashioned homemade desserts so memorable: simple ingredients, inviting aromas, and a soft, golden topping hiding a deliciously sweet apple filling.
Unlike traditional pudding made with milk and eggs on the stovetop, this old fashioned apple pudding is baked until the top becomes tender and cake-like while a warm brown sugar sauce develops underneath. The result falls somewhere between an apple cobbler, a moist spice cake, and a self-saucing dessert.
What makes this dessert particularly appealing is how little preparation it requires. There is no pastry to roll, no complicated custard to prepare, and no electric mixer needed. A few pantry staples, fresh apples, and one baking dish are enough to create a comforting dessert suitable for family dinners, autumn gatherings, or a relaxed weekend afternoon.
This FoodieMoms adaptation adds vanilla, a little nutmeg, and a balanced brown sugar topping to complement the apples without overwhelming their natural flavor.
Served warm with vanilla ice cream or a spoonful of whipped cream, this easy baked apple dessert is a delicious reminder that some of the most satisfying homemade treats are also the simplest.
Why You’ll Love Grandma Davidson’s Baked Apple Pudding
A good apple dessert should highlight the natural sweetness and texture of fresh apples while surrounding them with complementary flavors. This recipe achieves that balance with a few straightforward ingredients and a traditional baking method.
Here are several reasons this cinnamon apple pudding deserves a place in your dessert collection.
Simple pantry ingredients: Flour, brown sugar, baking powder, milk, and warm spices form the foundation of the pudding. Most of these ingredients are probably already in your kitchen.
No complicated equipment: Everything comes together using mixing bowls, a whisk, and a baking dish. There is no need for a stand mixer or specialized baking tools.
A naturally saucy texture: One of the most interesting characteristics of this dessert is the sauce that develops during baking. Hot water and brown sugar work with the batter to create a sweet liquid beneath the golden topping.
Perfect for apple season: Fresh autumn apples provide excellent flavor, but this recipe works throughout the year whenever good baking apples are available.
Great for family gatherings: The pudding serves six people and can easily be presented in individual dessert bowls.
Comforting without being complicated: The warm cinnamon aroma, tender apples, and soft topping create a homemade dessert that feels special without requiring hours of preparation.
What Makes Baked Apple Pudding Different?
The word pudding can describe several different desserts depending on the recipe and culinary tradition.
In American kitchens, pudding commonly refers to a smooth, creamy dessert thickened with starch or eggs. However, older baked pudding recipes often resemble soft cakes, fruit desserts, or steamed sponges.
Grandma Davidson’s Baked Apple Pudding belongs to this second category.
Instead of producing a uniform custard, the batter rises around pieces of fresh apple while the additional liquid helps form a sweet sauce beneath the surface.
The finished dessert has three distinctive elements.
The top develops a lightly golden exterior with a delicate cinnamon flavor. Just below it, the apples become soft and juicy without completely losing their shape. At the bottom, a warm brown sugar sauce collects, adding moisture and sweetness to every serving.
This is also why the dessert is best served with a spoon rather than sliced like a traditional cake.
Although it shares some characteristics with apple cobbler, there is no separate biscuit topping or pie crust. The apples are folded directly into the batter, creating a more integrated, pudding-like texture.
The contrast between the fluffy topping, tender fruit, and sweet sauce is what makes this self saucing apple pudding especially appealing.
Recipe Overview
- Preparation Time: 15 minutes
- Cooking Time: 45 minutes
- Resting Time: 10 minutes
- Total Time: 70 minutes
- Servings: 6
- Difficulty: Easy
- Course: Dessert
- Cuisine: American-inspired
- Best Served: Warm
This dessert is ideal when you want something homemade without spending the entire afternoon in the kitchen.
The preparation is quick, and the oven handles most of the work.
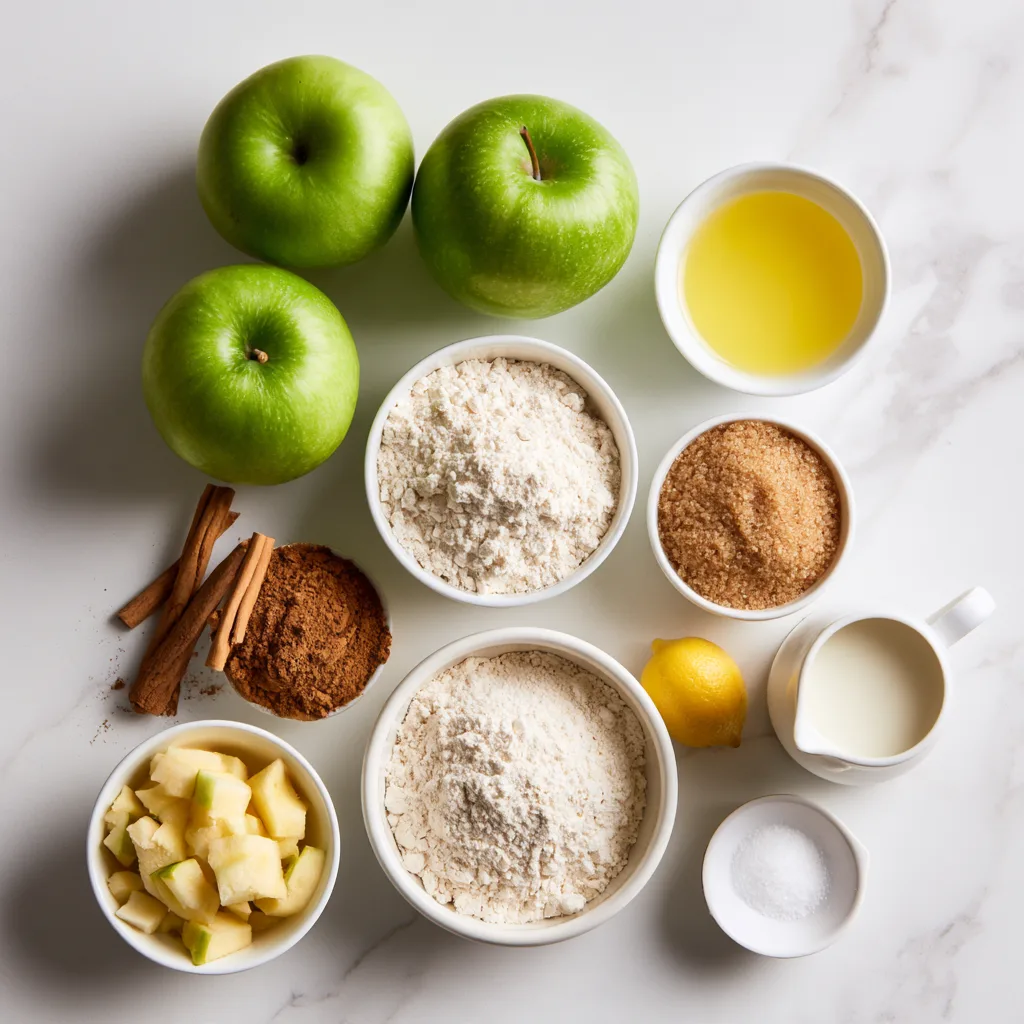
Ingredients for Grandma Davidson’s Baked Apple Pudding
This recipe uses familiar baking ingredients to create a tender apple pudding with a warm cinnamon flavor.
For the Apple Pudding Batter
- 1 cup all-purpose flour
- 1½ teaspoons baking powder
- ¼ teaspoon fine salt
- 1 teaspoon ground cinnamon
- ¼ teaspoon ground nutmeg
- ½ cup light brown sugar, packed
- ½ cup whole milk
- 2 tablespoons unsalted butter, melted and slightly cooled
- 1 teaspoon vanilla extract
- 3 medium tart apples, peeled, cored, and diced (approximately 2½–3 cups)
For the Brown Sugar Sauce
- ¼ cup light brown sugar, packed
- 1½ cups boiling water
- 1 teaspoon fresh lemon juice
Optional for Serving
- Vanilla ice cream
Understanding the Key Ingredients
Apples: Fresh tart apples provide the main flavor and texture. Granny Smith apples are particularly suitable because their acidity balances the sweetness of the brown sugar. They also hold their shape reasonably well during baking.
All-purpose flour: Flour gives the pudding its soft, cake-like structure. Measuring accurately helps prevent the topping from becoming dense.
Brown sugar: Brown sugar contributes sweetness and a subtle caramel-like flavor. It also helps create the characteristic sauce beneath the pudding.
Baking powder: This ingredient provides the lift needed for a tender topping. Without it, the pudding would become considerably heavier.
Cinnamon and nutmeg: These warming spices complement the natural flavor of baked apples. Cinnamon is the dominant spice, while nutmeg adds a subtle background note.
Whole milk: Milk hydrates the dry ingredients and helps create a soft batter. Its small amount of fat also contributes richness.
Butter: Melted butter adds tenderness and a pleasant buttery flavor without making the dessert overly heavy.
Vanilla extract: Vanilla brings together the apple, cinnamon, and brown sugar flavors.
Lemon juice: A small amount of acidity adds brightness to the brown sugar sauce and helps balance the overall sweetness.
Boiling water: Although adding water directly over cake batter may seem unusual, it is an essential part of this pudding’s preparation. The liquid helps create the sauce as the dessert bakes.
Instructions: How to Make Grandma Davidson’s Baked Apple Pudding
Follow these steps to create a warm, soft apple pudding with a golden topping and delicious brown sugar sauce.
Step 1: Preheat the Oven
- Preheat your oven to 375°F (190°C). Lightly grease a deep 2-quart baking dish with butter or cooking spray. Place the dish on a rimmed baking sheet to catch any sauce that might bubble over during baking.
Step 2: Combine the Dry Ingredients
- In a large mixing bowl, whisk together the all-purpose flour, baking powder, salt, cinnamon, nutmeg, and ½ cup of packed light brown sugar. Mix until the spices and baking powder are evenly distributed throughout the flour.
Step 3: Add the Wet Ingredients
- In a separate bowl, combine the milk, melted butter, and vanilla extract. Pour the mixture into the dry ingredients and stir gently until no dry flour remains. The batter will be fairly thick, which is normal for this recipe. Avoid excessive mixing, as it can make the finished pudding tough.
Step 4: Fold in the Apples
- Add the peeled, cored, and diced apples to the batter. Use a spatula to fold them through until the pieces are evenly distributed. Transfer the mixture to the prepared baking dish and spread it into an even layer.
Step 5: Add the Brown Sugar
- Sprinkle the remaining ¼ cup of packed light brown sugar evenly over the surface of the batter. Try to distribute it across the entire dish rather than concentrating it in one area.
Step 6: Pour the Hot Water
- Stir the lemon juice into the boiling water. Carefully pour the liquid over the back of a large spoon so it flows gently across the pudding. Do not stir the batter after adding the water. The liquid will initially sit above and around the batter, but this is expected.
Step 7: Bake Until Golden
- Carefully transfer the baking dish to the preheated oven. Bake uncovered for approximately 40–45 minutes, or until the top is puffed, lightly golden, and set. You should see some bubbling around the edges, indicating that the sauce underneath is hot. The apples should also be tender when tested carefully with a small knife.
Step 8: Rest and Serve
- Remove the pudding from the oven and allow it to rest for approximately 10 minutes. This resting period helps the sauce thicken slightly and makes serving easier. Spoon the warm pudding into six individual bowls, making sure each serving includes some of the sauce from the bottom. Add vanilla ice cream if desired.
The Secret to the Perfect Self-Saucing Apple Pudding
The most unusual step in this recipe is pouring boiling water over the unbaked pudding.
At first glance, it may seem like adding so much liquid would prevent the dessert from baking properly. However, the technique is what helps create its distinctive texture.
As the pudding bakes, the batter expands and becomes more structured, while the added liquid and dissolved sugar form a sweet sauce around and beneath it.
Some starch from the batter also contributes to the sauce’s consistency.
The finished dessert should therefore be moist and spoonable rather than firm enough to cut into perfect slices.
The most important rule is to avoid stirring after adding the boiling water.
Mixing the water directly into the batter would change how the dessert sets and could produce a much heavier consistency.
Pour the water gently, transfer the dish carefully, and allow the oven to do its work.
It is also important to let the pudding rest briefly before serving. Immediately after baking, the sauce may appear relatively thin. As the dessert cools slightly, it becomes easier to spoon up along with the apples and topping.
Choosing the Best Apples for Baked Apple Pudding
Selecting the right apples can make a noticeable difference in both flavor and texture.
For this old fashioned apple pudding, apples that maintain some structure when heated are generally the best choice.
Granny Smith Apples
Granny Smith apples are an excellent option because of their firm texture and noticeable tartness.
Their acidity contrasts beautifully with the brown sugar sauce and prevents the dessert from tasting excessively sweet.
Honeycrisp Apples
Honeycrisp apples provide a naturally sweet flavor and pleasant texture.
They are a good alternative when you prefer a slightly sweeter apple pudding.
Braeburn Apples
Braeburn apples offer a balance of sweetness and acidity, making them suitable for baked desserts.
Their flavor works particularly well with cinnamon and vanilla.
Pink Lady Apples
Pink Lady apples are another excellent choice for this recipe.
They maintain a pleasant texture during baking and contribute a bright, slightly tangy flavor.
Can You Mix Different Apples?
Absolutely.
Combining two apple varieties can create a more interesting flavor profile.
For example, using two Granny Smith apples and one Honeycrisp apple provides both tartness and natural sweetness.
Regardless of the variety, cut the apples into relatively uniform pieces, approximately ½ inch thick.
Consistent sizing helps them soften evenly as the pudding bakes.
Expert Tips for the Best Baked Apple Pudding
Although this dessert is easy to prepare, a few simple techniques can help you achieve a better result.
1. Measure the Flour Carefully
Too much flour can make the pudding dense and dry.
For the best results, spoon flour into your measuring cup and level the surface with a knife rather than scooping directly from the bag.
2. Use a Deep Baking Dish
The pudding rises while baking, and the sauce can bubble vigorously around the edges.
A deep baking dish provides enough space for both.
Avoid using a shallow pie plate, as the liquid may overflow.
3. Do Not Overmix
Stir the batter only until the ingredients are combined.
Overmixing develops gluten, potentially creating a tougher pudding rather than the soft texture you want.
4. Keep the Apple Pieces Uniform
Large chunks may remain too firm, while extremely small pieces can become mushy.
Small, evenly diced apples provide a good balance.
5. Pour the Water Gently
Using the back of a spoon helps distribute the hot water without disturbing the batter too much.
Remember that the water is supposed to remain separate initially.
6. Look for Visual Signs of Doneness
The surface should be golden and set, with bubbling sauce visible around the edges.
A toothpick test is less useful here than it is for ordinary cake because the pudding is intentionally moist underneath.
7. Serve While Warm
This dessert is at its best when the apples are tender, the sauce is warm, and the topping remains soft.
A small scoop of cold vanilla ice cream creates an especially satisfying contrast.
Delicious Variations to Try
The classic cinnamon apple flavor is wonderful on its own, but this dessert also lends itself to a few simple adjustments.
Apple Pudding with Pecans
Add ⅓ cup of chopped pecans to the batter for a gentle crunch and a nutty flavor.
Pecans complement the brown sugar sauce particularly well.
Extra-Spiced Apple Pudding
For a stronger autumn flavor, add a small pinch of ground cloves or allspice to the dry ingredients.
Use these spices sparingly so they do not overpower the apples.
Apple and Pear Pudding
Replace one of the apples with a firm pear.
The pear adds a delicate sweetness and creates a slightly softer fruit mixture.
Choose a pear that is ripe but not overly soft.
Maple Apple Pudding
Replace 2 tablespoons of the brown sugar in the batter with 2 tablespoons of pure maple syrup.
The batter may be slightly looser, but the maple flavor works beautifully with cinnamon and baked apples.
Dairy-Free Apple Pudding
Use unsweetened oat milk instead of whole milk and replace the butter with a suitable dairy-free baking alternative.
Check that your chosen replacement behaves similarly to butter when melted.
The flavor and texture may vary slightly.
What to Serve with Grandma Davidson’s Baked Apple Pudding
This dessert is delicious on its own, but a few simple additions can make it feel especially inviting.
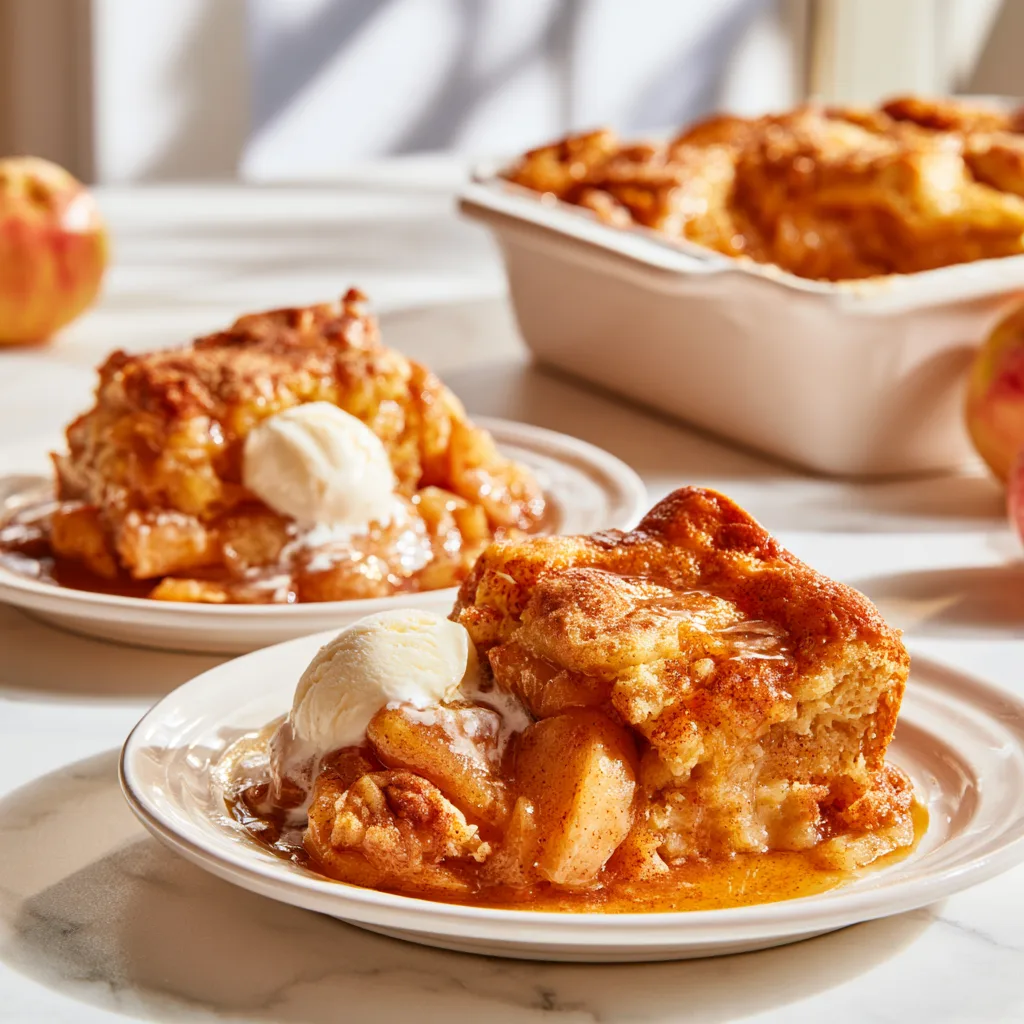
Vanilla ice cream is perhaps the most popular accompaniment for warm apple desserts. As the ice cream melts, it blends with the brown sugar sauce to create a rich, creamy finish.
Freshly whipped cream offers a lighter alternative. A small spoonful adds richness without overwhelming the apple flavor.
Pouring cream is another excellent choice, especially when serving the pudding as part of a traditional family dinner.
For an additional touch of flavor, sprinkle a little cinnamon over the finished dessert.
You can also add a few toasted pecans for texture.
If serving the pudding for Thanksgiving or another autumn gathering, present it in the baking dish and allow guests to spoon out their own portions.
Its rustic appearance is part of its charm.
How to Store and Reheat Baked Apple Pudding
Grandma Davidson’s Baked Apple Pudding is best enjoyed shortly after baking, but leftovers can still be delicious.
Refrigerating Leftovers
Allow the pudding to cool, then transfer it to an airtight container or cover the baking dish securely.
Refrigerate for up to 3 days.
The sauce will gradually thicken as the pudding cools, and some of the moisture may be absorbed into the topping.
This is normal.
Reheating in the Microwave
Place an individual portion in a microwave-safe bowl.
Heat in short intervals of approximately 20–30 seconds until warmed through.
If the pudding appears dry, add a teaspoon or two of water before reheating.
Reheating in the Oven
Place the remaining pudding in an oven-safe dish and cover loosely with foil.
Warm at 325°F (165°C) until heated through, usually around 15–20 minutes, depending on the quantity.
Can You Freeze Apple Pudding?
Freezing is possible, but it is not the preferred storage method.
The apples can become softer after thawing, and the sauce may change consistency.
For the best flavor and texture, enjoy the pudding fresh or refrigerated within a few days.
Can You Make This Apple Pudding Ahead of Time?
Some parts of the recipe can be prepared in advance, making it easier to serve during a busy family dinner.
The dry ingredients can be measured and mixed ahead of time.
Store them in a sealed container until you are ready to bake.
You can also measure the brown sugar for the sauce separately.
However, it is better to dice the apples shortly before assembling the pudding so they remain fresh.
The complete batter should ideally be baked soon after mixing because the baking powder begins reacting once it comes into contact with liquid.
If you need to prepare the entire dessert ahead of time, bake it earlier in the day and reheat gently before serving.
The pudding will be slightly softer after reheating, but its cinnamon apple flavor will remain delicious.
Common Mistakes to Avoid
Even straightforward baked desserts can occasionally produce unexpected results.
Understanding what might go wrong makes it easier to achieve the desired texture.
The Pudding Is Too Watery
A small amount of sauce underneath is expected.
However, if the pudding is excessively liquid and the topping has not set, it may need additional baking time.
Return it to the oven for another 5–10 minutes and check again.
Keep in mind that the sauce thickens slightly during resting.
The Top Is Too Dark
If the surface is browning faster than the center is cooking, loosely cover the dish with aluminum foil.
This helps protect the topping while allowing the interior to finish baking.
The Pudding Is Too Dense
Dense pudding can result from excessive mixing or inaccurate flour measurements.
Use a gentle hand when combining the wet and dry ingredients.
The Apples Are Still Firm
Apple pieces that are too large may require additional cooking time.
Dice the apples evenly and check for tenderness before removing the pudding from the oven.
There Is Not Enough Sauce
Some sauce is naturally absorbed by the pudding as it rests.
Using the correct amount of boiling water and avoiding excessive baking will help maintain the intended consistency.
Frequently Asked Questions
Is Grandma Davidson’s Baked Apple Pudding the Same as Apple Cobbler?
Not exactly.
Apple cobbler generally consists of a fruit filling covered with a separate biscuit-like or cake-like topping.
This baked apple pudding incorporates diced apples directly into the batter and develops a sauce underneath.
The result is softer and more integrated than many traditional cobblers.
Can I Make Baked Apple Pudding Without Eggs?
Yes.
This recipe contains no eggs.
The combination of flour, baking powder, milk, and melted butter creates the structure needed for the pudding to rise and bake properly.
That makes it a convenient choice when you want a homemade apple dessert without eggs.
Do I Have to Peel the Apples?
Peeling is recommended for the softest finished texture.
Apple skins can remain slightly chewy after baking, particularly when using firmer varieties.
However, you can leave the skins on if you prefer a more rustic dessert.
Can I Use Red Apples Instead of Green Apples?
Yes.
Red apple varieties such as Honeycrisp, Braeburn, and Pink Lady work well.
Just remember that sweeter apples will produce a sweeter overall dessert.
Why Do You Pour Boiling Water Over the Batter?
The boiling water helps form the sauce that collects beneath the pudding as it bakes.
This technique is responsible for the dessert’s distinctive self-saucing texture.
The water should not be stirred into the batter after pouring.
Can I Reduce the Sugar?
You can reduce the brown sugar in the batter slightly, but significant reductions may affect both flavor and texture.
The sugar sprinkled over the top is particularly important for developing the sauce.
If you prefer a less sweet dessert, start with tart apples and serve without ice cream rather than substantially changing the sauce ingredients.
Can I Use Gluten-Free Flour?
A gluten-free all-purpose flour blend designed for one-to-one baking substitutions may work.
Choose a blend that already contains a suitable binder, such as xanthan gum.
Because gluten-free flour blends absorb liquid differently, the final texture may vary.
Should Baked Apple Pudding Be Served Hot or Cold?
Warm is the preferred serving temperature.
The brown sugar sauce remains fluid, the apples are soft, and the spices are especially aromatic.
Cold leftovers are safe to eat when properly stored, but reheating generally provides a more enjoyable texture.
A Little Old-Fashioned Apple Dessert Tradition
Apple desserts have long been a familiar part of home baking because apples are versatile, widely available, and pair naturally with simple pantry ingredients.
Pies, cobblers, crisps, and baked puddings all offer different ways to transform the same basic fruit into something comforting.
Baked puddings are particularly interesting because they do not require the careful shaping or assembly associated with pastry desserts.
A simple batter, fresh fruit, and a hot oven can produce a satisfying result.
The tradition of serving warm fruit desserts with cream or ice cream also remains popular for good reason.
The cool, creamy accompaniment balances the warm fruit and sweet sauce without requiring another complicated preparation.
Grandma Davidson’s Baked Apple Pudding fits comfortably into this style of baking: practical, uncomplicated, and designed to be shared.
Final Thoughts
Grandma Davidson’s Baked Apple Pudding brings together tender apples, warming spices, a soft golden topping, and a sweet brown sugar sauce in one comforting dessert.
Its simple preparation makes it suitable for beginner bakers, while the finished result feels special enough for a family gathering or holiday meal.
Whether you are looking for an easy baked apple dessert during apple season or a comforting cinnamon apple pudding to serve after dinner, this recipe offers plenty of homemade flavor without complicated techniques.
For the best experience, serve it warm, spoon some of the sauce over each portion, and finish with a little vanilla ice cream.
Sometimes, the simplest desserts are the ones worth returning to.
Grandma Davidson’s Baked Apple Pudding
Ingredients
Equipment
Method
- Preheat the oven to 375°F (190°C). Lightly grease a deep 2-quart baking dish and set it on a rimmed baking sheet.
- In a large mixing bowl, whisk together the flour, baking powder, salt, cinnamon, nutmeg, and 1/2 cup packed light brown sugar.
- In another bowl, stir the milk, melted butter, and vanilla together. Pour into the dry mixture and stir just until no dry flour remains.
- Fold in the peeled, cored, and diced apples. Spread the thick batter evenly in the prepared baking dish.
- Sprinkle the remaining 1/4 cup packed light brown sugar evenly over the batter.
- Stir the lemon juice into the boiling water. Slowly pour the hot liquid over the back of a spoon across the pudding. Do not stir after adding the water.
- Bake uncovered for 40–45 minutes, until the top is puffed and golden, the apples are tender, and brown-sugar sauce bubbles near the edges.
- Remove from the oven and let stand for 10 minutes so the sauce thickens slightly. Spoon into six bowls, scooping from the bottom to include sauce. Serve warm, with vanilla ice cream if desired.


