Ouija Board Sheet Cake: A Spooky Halloween Chocolate Cake
When Halloween rolls around, ordinary chocolate cake deserves a delightfully spooky makeover. This Ouija Board Sheet Cake combines a rich, moist chocolate cake with creamy vanilla buttercream and an eye-catching edible Ouija board design. The result is a Halloween dessert that looks elaborate but uses familiar baking ingredients and approachable decorating techniques.
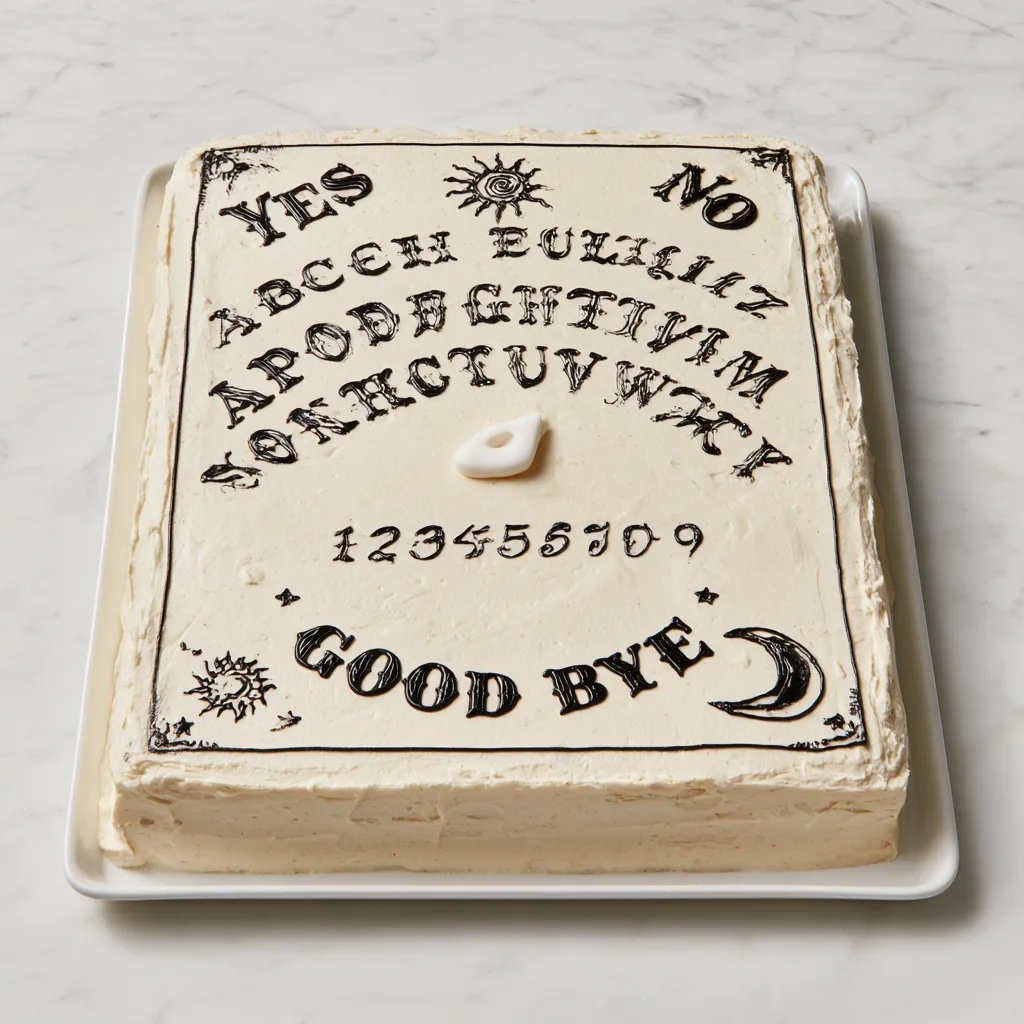
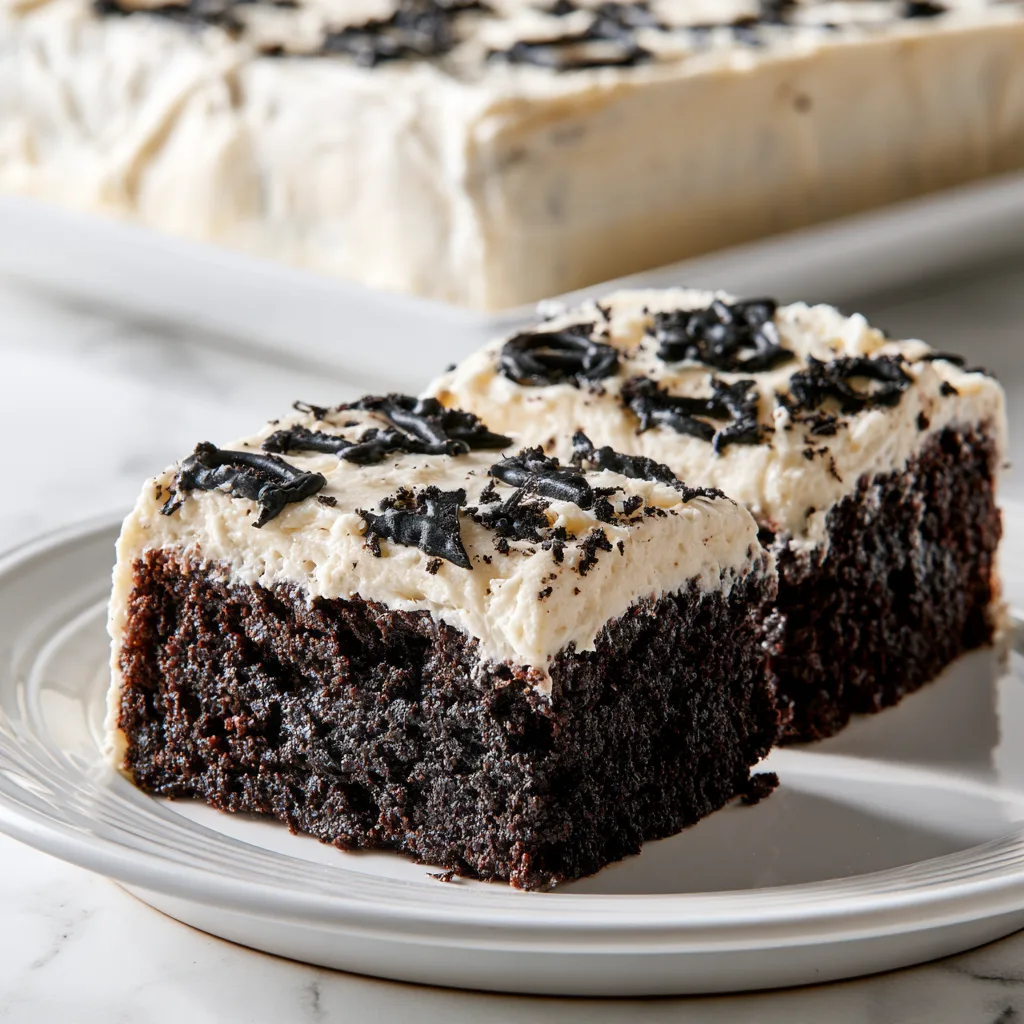
The dark chocolate cake provides a striking contrast against the pale, parchment-colored frosting, while piped black lettering transforms the surface into a mysterious vintage-inspired Ouija board. A small edible fondant planchette completes the design, making the cake a memorable centerpiece for Halloween parties, October birthdays, horror movie nights, and themed dessert tables.
Despite its detailed appearance, this Halloween Ouija board cake does not require professional cake-decorating experience. The chocolate base comes together in one mixing bowl, the buttercream uses a handful of ingredients, and the decorations can be created with a simple writing icing tube.
Whether you’re preparing a dessert for a neighborhood Halloween gathering or planning a themed celebration at home, this spooky Halloween sheet cake brings together delicious flavor, creative presentation, and plenty of seasonal personality.
Why You’ll Love This Ouija Board Sheet Cake
There are several reasons this dessert deserves a place on your Halloween baking list.
Rich, moist chocolate cake: The base is made with cocoa powder, buttermilk, and a little hot coffee to create a tender chocolate crumb with deep flavor.
An impressive Halloween design: The ivory frosting and black lettering recreate the appearance of an antique Ouija board without requiring complicated sculpting or specialized baking equipment.
Easy to serve a crowd: Unlike a tall layer cake, this rectangular sheet cake can be sliced into 16 generous portions without complicated cutting.
Customizable decorations: The lettering, symbols, and placement of the fondant planchette can be adapted to suit your decorating experience.
Perfect for preparing ahead: The chocolate cake can be baked the day before decorating, making Halloween party preparation considerably easier.
Most importantly, this dessert tastes like a homemade chocolate cake rather than a novelty decoration. Beneath the spooky surface is a soft, flavorful cake topped with smooth vanilla buttercream.
What Does Ouija Board Sheet Cake Taste Like?
This chocolate Halloween cake has a rich cocoa flavor balanced by sweet, creamy vanilla frosting.
Buttermilk provides gentle tanginess and helps create a soft crumb, while vegetable oil keeps the cake moist even after refrigeration. The optional hot coffee intensifies the chocolate flavor without making the finished dessert taste strongly of coffee.
The buttercream is fluffy, buttery, and lightly flavored with vanilla. A small amount of cocoa powder can give it an antique parchment color while adding just a hint of chocolate.
The edible fondant planchette provides a slightly chewy, sweet contrast to the soft cake.
Together, these elements create a familiar chocolate-and-vanilla dessert with a distinctly Halloween-inspired appearance.
Ouija Board Sheet Cake Recipe Overview
- Prep Time: 50 minutes
- Cook Time: 35 minutes
- Cooling Time: Approximately 60 minutes
- Total Time: Approximately 145 minutes
- Servings: 16 slices
- Difficulty: Medium
- Course: Dessert
- Cuisine: American, Halloween-inspired
The main baking process is straightforward. Most of the hands-on attention goes toward frosting the cake and carefully creating the Ouija board lettering.
Ingredients
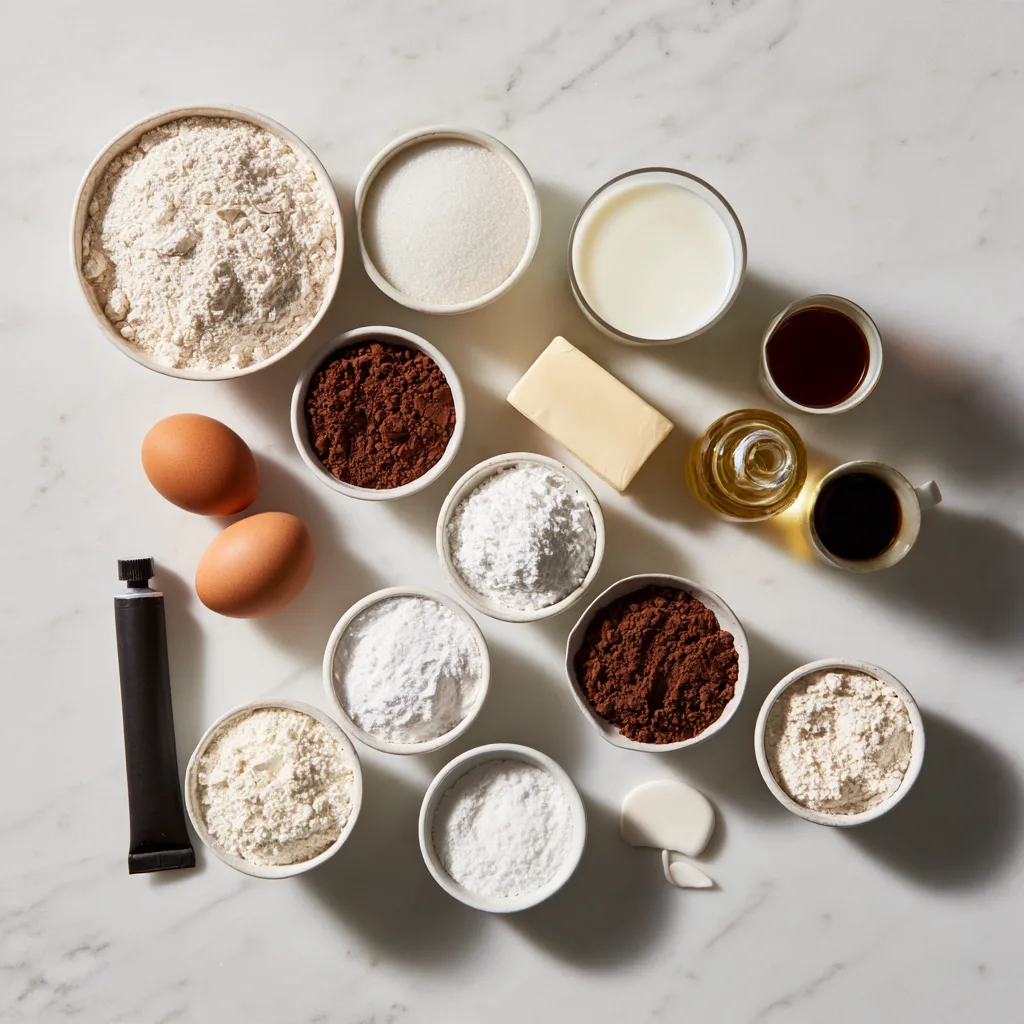
This Ouija Board Sheet Cake uses three main components: a chocolate cake base, vanilla buttercream, and edible Halloween decorations.
For the Chocolate Sheet Cake
- 2 cups all-purpose flour
- 1¾ cups granulated sugar
- ¾ cup unsweetened cocoa powder
- 1½ teaspoons baking powder
- 1½ teaspoons baking soda
- 1 teaspoon fine salt
- 2 large eggs, room temperature
- 1 cup buttermilk, room temperature
- ½ cup neutral vegetable oil
- 2 teaspoons vanilla extract
- 1 cup hot brewed coffee or hot water
For the Vanilla Buttercream
- 1 cup unsalted butter, softened
- 4 cups powdered sugar, sifted if lumpy
- 2–3 tablespoons milk
- 1 teaspoon vanilla extract
- ⅛ teaspoon fine salt
- 1 teaspoon unsweetened cocoa powder, optional for a vintage parchment color
For the Ouija Board Decorations
- 1 tube (2–3 ounces) black ready-to-use decorating icing with a fine writing tip, plus more if needed
- 2 ounces white ready-to-roll fondant
- 1 teaspoon powdered sugar, for dusting the work surface
Equipment You’ll Need
A 9×13-inch baking pan is essential for achieving the traditional rectangular shape.
You’ll also need mixing bowls, a whisk, parchment paper, an electric mixer, and an offset spatula for spreading the frosting.
For decorating, a fine writing icing tip will help create the letters and numbers. A small rolling pin and a clean drinking straw are useful for shaping the fondant planchette.
Understanding the Key Ingredients
A few ingredients play particularly important roles in making this chocolate Halloween cake successful.
Cocoa Powder
Unsweetened cocoa powder gives the cake its deep chocolate flavor and dark color. Natural unsweetened cocoa powder is a reliable choice for this recipe because the batter contains baking soda and acidic buttermilk.
Avoid replacing cocoa powder with sweetened drinking chocolate, which contains additional sugar and may produce a different texture.
Buttermilk
Buttermilk adds moisture and a subtle tang that balances the sweetness of the cake.
Its acidity also works with the baking soda to help create a light, tender crumb.
If buttermilk isn’t available, a homemade alternative can be prepared by adding 1 tablespoon of lemon juice or white vinegar to a measuring cup, then adding regular milk to reach 1 cup. Let the mixture stand for approximately 5–10 minutes before using.
The substitute may produce a slightly different flavor and texture, but it is a practical option.
Hot Coffee or Water
Hot liquid helps disperse the cocoa powder throughout the batter.
Coffee is particularly useful because it enhances the perception of chocolate richness. However, hot water works well if you prefer to avoid coffee.
The finished batter will look noticeably thinner than traditional butter cake batter. This is expected and helps produce a moist chocolate sheet cake.
Buttercream Frosting
A simple American-style vanilla buttercream is ideal for this design because it spreads smoothly and provides a light background for the black decorations.
The optional teaspoon of cocoa powder adds a subtle beige tint that resembles aged parchment.
Avoid adding too much cocoa, as a dark frosting would reduce the contrast with the lettering.
Instructions: How to Make Ouija Board Sheet Cake
Follow these steps to prepare the chocolate cake, make the buttercream, and assemble the Halloween design.
Step 1: Prepare the Baking Pan
Preheat your oven to 350°F (175°C).
Lightly grease a 9×13-inch baking pan and line the bottom with parchment paper.
If you want to remove the entire cake for presentation, leave some parchment extending beyond the sides of the pan.
Alternatively, the cake can be decorated and served directly from the baking pan.
Step 2: Combine the Dry Ingredients
In a large mixing bowl, whisk together the all-purpose flour, granulated sugar, cocoa powder, baking powder, baking soda, and salt.
Continue whisking until the cocoa is evenly distributed and no large lumps remain.
This step helps prevent pockets of baking powder or cocoa powder from appearing in the finished cake.
Step 3: Add the Wet Ingredients
Add the eggs, buttermilk, vegetable oil, and vanilla extract to the dry ingredients.
Mix until everything is combined and the batter looks smooth.
Slowly pour in the hot brewed coffee or hot water, stirring carefully as you go.
The mixture will become quite thin. Resist the temptation to add extra flour because the liquid is important for the cake’s final texture.
Step 4: Bake the Chocolate Cake
Pour the batter into the prepared pan, spreading it evenly toward the corners.
Place the pan on the middle rack of the preheated oven.
Bake for approximately 32–38 minutes, checking around the 35-minute mark.
The cake is ready when the center springs back lightly when touched and a toothpick inserted into the middle comes out with a few moist crumbs but no wet batter.
Avoid baking until the cake is completely dry, as this may result in a crumbly texture.
Step 5: Cool Completely
Transfer the baking pan to a wire rack and allow the cake to cool completely, approximately 60 minutes.
Depending on room temperature and the type of pan, additional cooling time may be necessary.
Never spread buttercream over a warm cake. Even slight residual heat can soften the frosting, making the decorative lettering difficult to apply.
Step 6: Prepare the Vanilla Buttercream
Place the softened unsalted butter in a large bowl.
Beat with an electric mixer until creamy and smooth.
Gradually add the powdered sugar, mixing at low speed initially to prevent a cloud of sugar.
Add the vanilla extract, salt, and 2 tablespoons of milk.
Increase the mixer speed and beat until the frosting becomes light and fluffy.
If the buttercream feels too stiff to spread, add the remaining milk a little at a time.
For an antique parchment appearance, mix in the optional teaspoon of cocoa powder.
The finished frosting should be smooth enough to spread but firm enough to hold decorative details.
Step 7: Frost the Cake
Once the chocolate cake has cooled completely, spread an even layer of vanilla buttercream across the surface.
Use an offset spatula to create a smooth finish.
The frosting doesn’t need to be perfectly flawless. A few subtle variations in texture can complement the vintage appearance of the Ouija board.
However, a reasonably flat surface will make the lettering much easier to apply.
Step 8: Create the Ouija Board Lettering
Before applying black icing, use a clean toothpick to lightly mark the placement of the main design elements.
Start with the outer border, leaving a little space around the edges.
Then arrange the following traditional Ouija board details:
- YES near the upper-left corner
- NO near the upper-right corner
- The alphabet arranged in two or three curved rows
- Numbers 0 through 9 beneath the alphabet
- GOOD BYE near the bottom
- Optional crescent moon and sun illustrations
Carefully pipe the lettering using black ready-to-use decorating icing fitted with a fine writing tip.
Work slowly, keeping the lettering consistent in size and spacing.
For especially neat results, practice writing a few letters on parchment paper before decorating the cake.
Step 9: Make the Edible Planchette
Lightly dust a clean work surface with powdered sugar.
Roll the white fondant to approximately ¼-inch thickness.
Shape it into a small rounded triangle with a slightly heart-shaped upper section, resembling a traditional Ouija board planchette.
Use the end of a clean drinking straw to cut a small circular opening near the pointed end.
Carefully transfer the fondant decoration onto the frosted cake.
Position it near the center or slightly to one side so that some of the lettering remains visible.
Step 10: Slice and Serve
Once the decorations are finished, the Ouija Board Sheet Cake is ready to serve.
Use a sharp knife to cut the cake into 16 slices.
For cleaner edges, wipe the knife between cuts.
If the cake has been refrigerated, let the slices stand at room temperature for approximately 20 minutes before serving. This allows the buttercream to soften and improves the texture of the chocolate cake.
How to Decorate a Halloween Ouija Board Cake Like a Pro
The secret to a beautiful Ouija board cake is planning the layout before applying any black icing.
Unlike colorful Halloween cakes covered in sprinkles and candy, this design relies on contrast and carefully arranged lettering.
Start With the Outer Border
A thin rectangular border immediately gives the cake the appearance of a vintage board.
Keep the border approximately ½ inch inside the outer edges so the decorations remain visible when slicing.
A slightly irregular hand-piped line can enhance the antique effect, so minor imperfections aren’t necessarily a problem.
Arrange the Alphabet Carefully
The alphabet is the most recognizable element of the design.
For a 9×13-inch cake, two or three gently curved rows generally provide enough room for all 26 letters.
Lightly marking the positions with a toothpick will help prevent crowding near the edges.
Keep the letters relatively small and avoid making them too thick.
Include the Classic Symbols
A crescent moon and a stylized sun add an extra layer of visual interest.
These details can be simplified into small curved lines, dots, and short rays.
If intricate piping feels intimidating, concentrate on clear lettering rather than complicated illustrations.
Position the Planchette Last
The fondant planchette should be added after all the icing details are finished.
Placing it last prevents it from getting in the way while piping.
It also allows you to cover any small lettering mistakes strategically.
Only use food-safe, edible decorations. Actual game pieces, craft glitter, and ordinary markers should never come into contact with the cake.
Expert Tips for the Best Ouija Board Sheet Cake
Even a relatively simple spooky Halloween sheet cake benefits from a few reliable baking and decorating techniques.
Measure Flour Correctly
Too much flour can make chocolate cake dense and dry.
For consistent results, spoon flour into the measuring cup and level the top instead of scooping directly from the container.
Using a kitchen scale is even more accurate.
Use Room-Temperature Ingredients
Room-temperature eggs and buttermilk combine more easily with the other ingredients.
They also help produce a more uniform batter.
Take refrigerated ingredients out approximately 20–30 minutes before baking, while keeping food-safety considerations in mind.
Don’t Overmix the Batter
Once the wet and dry ingredients are combined, mix only until the batter becomes smooth.
Excessive mixing can develop gluten and result in a tougher cake.
Keep the Frosting Light
The pale buttercream is what makes the Ouija board design recognizable.
If using cocoa powder to create the parchment shade, begin with a small amount and check the color before adding more.
Practice the Lettering
Black decorating icing is difficult to hide once it touches a pale frosting surface.
Practicing the alphabet and numbers on parchment paper can make the decorating process significantly less stressful.
Keep the Design Balanced
It’s tempting to add extra Halloween decorations, but too many details can make the board look cluttered.
Simple lettering, a thin border, a few celestial symbols, and one fondant planchette usually create the strongest visual impact.
Creative Variations and Decorating Ideas
There are several ways to customize this Ouija Board Sheet Cake without changing the overall concept.
Dark Chocolate Ouija Board Cake
For an extra-rich chocolate flavor, use a good-quality dark cocoa powder and hot brewed coffee in the batter.
Keep the frosting vanilla-flavored to maintain the contrast between the light surface and dark interior.
Aged Parchment Halloween Cake
Add the optional cocoa powder to the buttercream for a beige background.
To create a more weathered effect, lightly brush a few tiny areas of the frosting with a food-safe mixture of cocoa powder and powdered sugar.
Use restraint so the surface stays light enough for the writing to stand out.
Kid-Friendly Halloween Board
For a less mysterious design, replace some of the traditional board lettering with playful Halloween words.
Small pumpkins, friendly ghosts, stars, or candy illustrations can make the cake suitable for a children’s party.
Mini Ouija Board Cupcakes
The same chocolate batter can be baked in cupcake liners, with the baking time adjusted appropriately.
Each cupcake can feature a miniature letter, number, moon, or star.
Arrange the decorated cupcakes together to suggest a larger Ouija board.
This variation is especially convenient when individual servings are preferred.
Gluten-Free Variation
A gluten-free all-purpose flour blend formulated as a direct replacement for wheat flour may work, although the texture and rise can differ.
Choose a blend intended for cakes and check whether it contains xanthan gum.
For guests with celiac disease, verify that every ingredient and decorating product is certified or appropriately labeled gluten-free and prevent cross-contact.
Make-Ahead Instructions
One of the biggest advantages of a chocolate sheet cake is that you can prepare the components separately.
One Day Before Serving
Bake the chocolate cake and allow it to cool completely.
Cover the pan tightly with plastic wrap or a suitable lid and keep it in a cool room if your kitchen conditions allow.
The buttercream can also be prepared ahead and refrigerated in an airtight container.
Before decorating, allow refrigerated buttercream to soften enough to spread and beat it briefly to restore its fluffy texture.
On the Day of the Party
Spread the buttercream over the cooled cake and complete the Ouija board decorations.
The lettering is easiest to control when the frosting is smooth and slightly firm.
If the cake must travel, refrigerating it briefly before transport can help stabilize the decorations.
Use a sturdy cake carrier or box that leaves adequate space above the frosting.
How to Store Ouija Board Sheet Cake
Proper storage helps preserve both the flavor and the intricate Halloween design.
At Room Temperature
In a cool environment, the cake can generally be kept covered for up to 1 day, provided the ingredients and conditions are suitable.
If the room is particularly warm, refrigeration is the safer option because buttercream can soften considerably.
In the Refrigerator
Store the decorated cake in an airtight container or covered cake carrier for up to 4 days.
Avoid pressing plastic wrap directly onto the decorations because the black icing may smear.
Before serving, allow the cake to sit at room temperature for approximately 20 minutes.
In the Freezer
Undecorated chocolate cake freezes particularly well.
Wrap the completely cooled cake tightly in plastic wrap, followed by a layer of foil, and freeze for up to 2 months for best quality.
Thaw overnight in the refrigerator, then bring it to room temperature before frosting.
Freezing the finished decorated cake is less ideal because condensation may affect the black lettering and fondant details.
Serving Suggestions for Halloween Parties
This Ouija Board Sheet Cake looks especially striking as the centerpiece of a Halloween dessert table.
Present the whole cake on a white platter or dark serving board so guests can appreciate the design before cutting.
For a larger party spread, pair it with simple Halloween treats such as chocolate-dipped pretzels, pumpkin-shaped cookies, caramel popcorn, or vanilla cupcakes.
The deep chocolate flavor also pairs beautifully with hot chocolate, coffee, cold milk, or a nonalcoholic spiced apple drink.
If the cake is being served at a children’s party, smaller slices may be preferable, especially when several other desserts are available.
To keep the decorative elements intact, cut straight down with a clean knife rather than dragging it across the frosted surface.
Frequently Asked Questions
Can I Make Ouija Board Sheet Cake Without Fondant?
Absolutely. The fondant planchette is decorative rather than necessary for the cake’s structure or flavor.
You can pipe a simple planchette shape directly onto the buttercream using black decorating icing.
Another option is to leave the planchette off entirely and focus on the lettering and symbols.
The cake will still have the recognizable appearance of a Ouija board.
Can I Use a Boxed Chocolate Cake Mix?
Yes. A boxed chocolate cake mix is a convenient shortcut when decorating is your main priority.
Prepare the cake according to the package directions for a 9×13-inch pan, then let it cool completely.
Follow the buttercream and decorating instructions from this recipe.
The result won’t have exactly the same flavor and texture as the homemade chocolate cake, but the overall Halloween presentation can be very similar.
How Do I Keep Black Icing From Bleeding Into Buttercream?
Use a thick, ready-to-use decorating icing designed for piping rather than a thin food-coloring mixture.
Make sure the buttercream isn’t overly soft before adding the letters.
Briefly chilling the frosted cake can provide a firmer surface.
Avoid exposing the finished cake to excessive moisture or condensation, which may cause some decorating colors to migrate.
What If I Don’t Have a Piping Bag?
A ready-to-use decorating icing tube with a writing tip is the easiest alternative.
You can also place thick decorating icing inside a small disposable piping bag and cut a very tiny opening at the tip.
Begin with a smaller opening than you think you need.
Thick lines can make the letters difficult to read, especially on a relatively compact sheet cake.
Can I Prepare the Cake Two Days Before Halloween?
Yes. The chocolate cake can be baked two days before serving and kept properly wrapped.
For the neatest presentation, consider decorating the cake closer to the event.
If the finished cake must be refrigerated overnight, store it in a covered container and avoid unnecessary temperature changes that could cause condensation.
How Many People Does This Halloween Sheet Cake Serve?
A standard 9×13-inch cake provides approximately 16 generous slices.
For a party where several desserts are available, you can divide it into 20–24 smaller pieces.
The final serving count depends on the size of the slices and whether the cake is the main dessert.
Can I Make This Cake Without Coffee?
Yes. Replace the hot brewed coffee with the same amount of hot water.
The cake will still have a rich chocolate flavor, although coffee can provide additional depth.
Using water is especially useful when preparing the recipe for guests who prefer to avoid coffee.
Is the Ouija Board Decoration Completely Edible?
Yes, when prepared with the ingredients specified in this recipe.
The black lettering is made from edible decorating icing, and the planchette is shaped from food-grade fondant.
If you add any extra decorative details, make sure they are specifically intended for food use.
Avoid using craft supplies or actual Ouija board accessories directly on the cake.
Final Thoughts
A homemade Ouija Board Sheet Cake is an imaginative way to turn a familiar chocolate dessert into a memorable Halloween centerpiece.
The moist chocolate base, fluffy vanilla buttercream, delicate black lettering, and edible fondant planchette combine to create a cake that looks mysterious while remaining delicious and approachable.
With a little patience during decorating, even home bakers with limited piping experience can create a striking Halloween dessert.
For parties, themed birthdays, or a spooky family baking project, this chocolate Ouija board cake offers a creative combination of classic flavor and festive presentation.
Ouija Board Sheet Cake
Ingredients
Equipment
Method
- Preheat the oven to 350°F (175°C). Lightly grease a 9 x 13-inch baking pan and line its base with parchment paper, leaving an overhang if you plan to lift out the cake.
- Whisk flour, granulated sugar, cocoa powder, baking powder, baking soda, and salt in a large mixing bowl until evenly combined.
- Add eggs, buttermilk, oil, and vanilla. Mix just until smooth. Slowly stir in hot coffee or hot water; the batter will look thin, which is normal.
- Pour batter into the prepared pan. Bake for about 32–38 minutes, checking near 35 minutes, until the center springs back lightly and a toothpick comes out with a few moist crumbs but no wet batter.
- Cool the cake completely in its pan on a wire rack for about 60 minutes. Do not frost it while warm.
- Beat softened butter until creamy. Add powdered sugar in batches, then vanilla, salt, and 2 tablespoons milk. Beat until fluffy; add the remaining milk only as needed. Mix in optional cocoa powder for a light parchment tint.
- Spread buttercream in a smooth, even layer over the cooled cake. Lightly trace a border and lettering guides with a clean toothpick, leaving room for YES, NO, the alphabet, 0–9, and GOOD BYE.
- Pipe the board border, YES and NO, rows of alphabet letters, numbers, GOOD BYE, and optional sun-and-moon symbols with black decorating icing using a fine tip. Work slowly, cleaning the tip between details.
- Roll the white fondant to about 1/4 inch thick on a lightly dusted surface. Cut or shape a small rounded triangular, heart-like planchette and remove a little circle near its pointed end with a clean straw. Place it on the cake.
- Slice into 16 pieces with a clean knife, or cover and refrigerate until serving. For best texture, let refrigerated slices stand at room temperature for about 20 minutes before eating.